-Alright, not exactly photoblog material, but this is as good a place as any to post up a nice How-To Guide. Enjoy.
Typically, to give internet access to my VM environment in Hyper V, I would create an External NIC then bridge it to my Wifi-adapter on my Host (laptop in this example). This became an issue when I entered certain guest internet environments (hotels, office buildings, etc) where the guest network would only lease a single public IP per connected device.
Configuring a Windows Server instance to behave as a NAT router helps work around this issue. It is a great way to route internet traffic to your VM environment without requiring NIC Bridging on your VM Host or requiring your Host to obtain multiple internet enabled IP addresses.
Step 1. Create Virtual NICs
Start by creating two Internal Virtual NICs in Hyper V (as opposed to External or Private).

Set Up Virtual Nics
One will be used for sharing your Host’s NIC connection with the External facing Virtual NIC, while the other will be used to pass internet traffic to your Hyper V VM environment. I’ve named mine RAS_Server_Internal and RAS_Server_External.

Hyper-V NICs showing up in my Host Computer’s Network Adapters
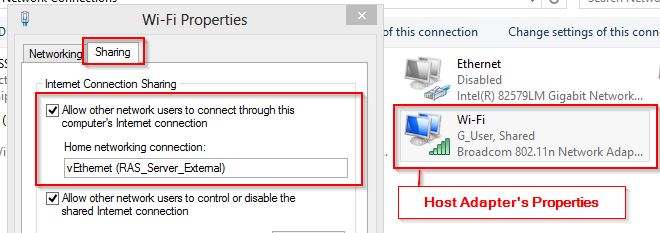
Go to the properties of your Host computer NIC and enable sharing with your Virtual NIC named RAS_SERVER_External.
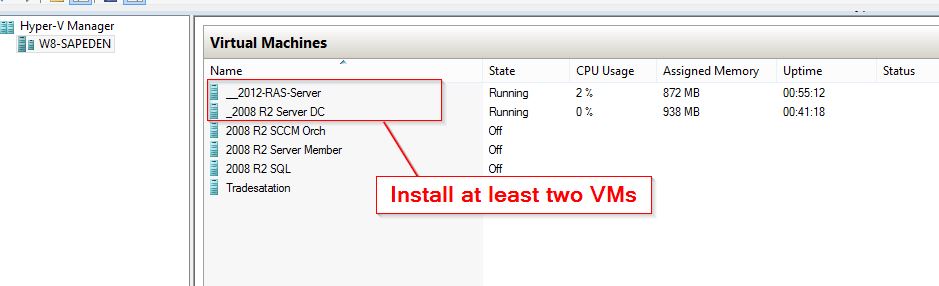
Step 2. Create at least Two VMs
RRAS has been a feature included in Windows Server since 2003. I am setting it up on a Windows 2012 VM to act as my router. I also have a 2008R2 server I’ve set up that acts as a domain controller in my test lab environment I’ll use for testing internet connectivity in this guide.
Add both Virtual NICs (named RAS_SERVER_External and RAS_SERVER_Internal) to the Server being used as a Router, but only add the NIC named RAS_SERVER_Internal to VMs that will be connecting to the Router Server for an internet connection.

In settings for the VM, add the Network Adapters.
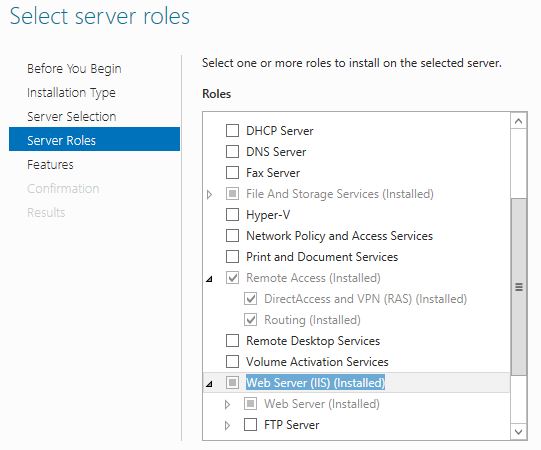
Step 3. Install the Remote Access Role on your Router VM.
Install the Remote Access Role along with any dependencies, such as IIS.
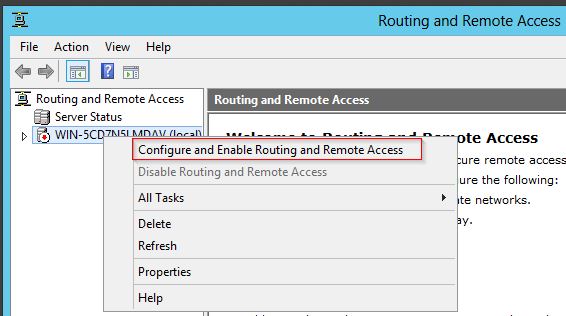
Open the Routing and Remote Access utility and right click on your sever then select Configure and Enable Routing and Remote Access.
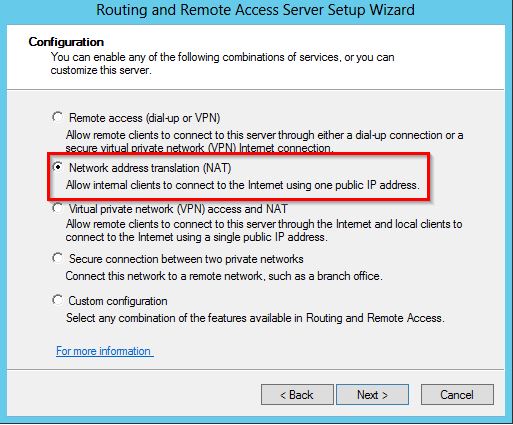
Working your way through the Wizard, make sure you specify that you want to set up Network Address Translation (NAT).
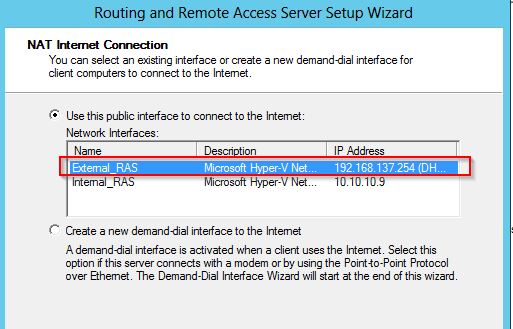
Designate your External NIC as the one you want to receive internet traffic from.
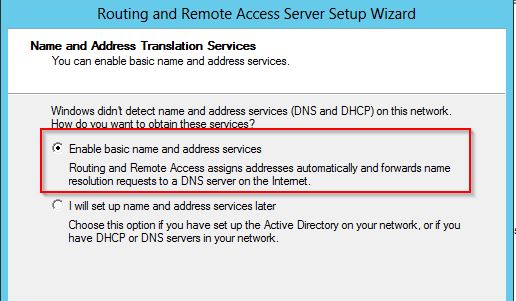
Enable Basic Name and Address Spaces (in this case, my server which is acting as a router is not part of a domain).
Step 4. Configure the Addresses on your Network Cards
The Router Server there should be two NICs present in the Network Connections. These were connected to the VM in Step 2.
For the adapter connected RAS_Server_ExternalL Virtual NIC, leave the settings as their default. For the adapter connected to the RAS_Server_Internal NIC, give it an IP and Subnet Mask within the same range as any VMs that wish to connect to it to gain internet access.
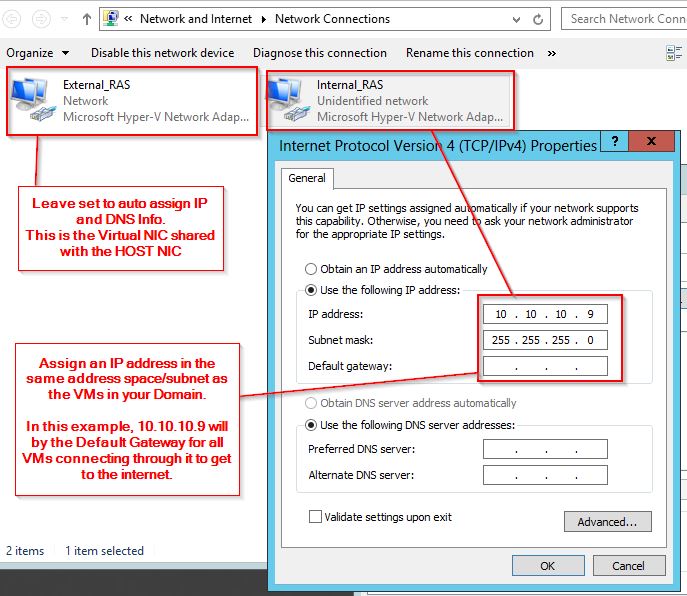
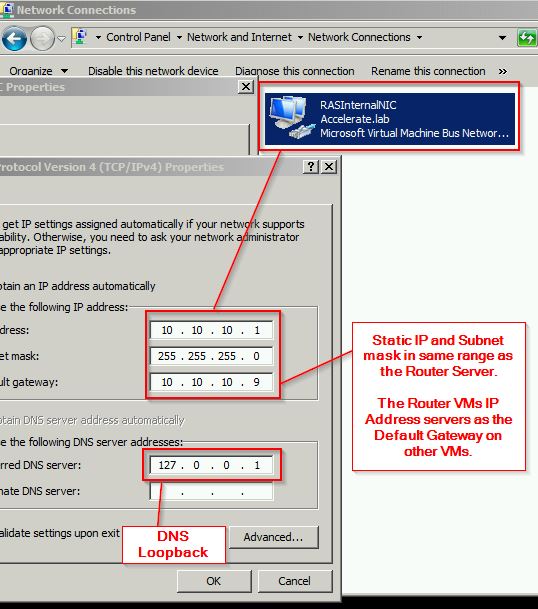
On any VMs connecting to the Router Server to gain internet access, you should have assigned it the RAS_Server_Internal NIC (in step 2). Configure the IP Settings for this NIC so that it is in the same IP Range/Subnet Mask as the Router Server and use the Router Server’s IP address as the Default Gateway.
*In this example, my Test VM is also a DC and DNS Server, so I loopback the DNS to point at itself.
VOILA! You’re online!
If everything is working together right, you should be able to access the internet on your VMs within Hyper V without the need for multiple IP addresses from the external internet connection.